转载: HTML Tips - Marko Denic - Web Developer
In this article, I will share with you some very useful HTML Tips . Enjoy!
But first, what is HTML? Hypertext Markup Language (HTML) is the standard markup language for documents designed to be displayed in a web browser. It can be assisted by technologies such as Cascading Style Sheets (CSS) and scripting languages such as JavaScript.
# The loading=lazy attributePerformance tip. You can use the loading=lazy attribute to defer the loading of the image until the user scrolls to them.
1 <img src ="image.jpg" loading ="lazy" alt ="Alternative Text" />
# Email, call, and SMS links:1 2 3 4 5 <a href ="mailto:{email}?subject={subject}&body={content}" > Send us an email </a > <a href ="tel:{phone}" > Call us </a > <a href ="sms:{phone}?body={content}" > Send us a message </a >
# Ordered lists start attribute.Use the start attribute to change the starting point for your ordered lists.
1 2 3 4 5 6 7 <ol start ="11" > <li > HTML</li > <li > CSS</li > <li > JavaScript</li > <li > Python</li > <li > Go</li > </ol >
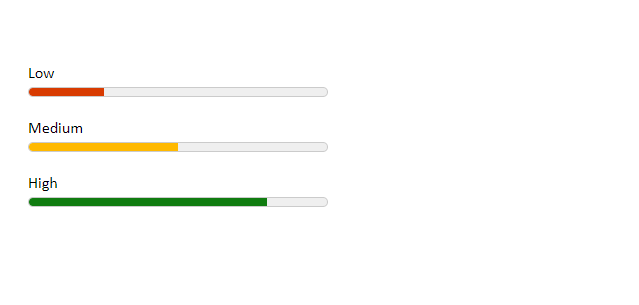
# The meter elementYou can use the <meter> element to display quantities. No JavaScript/CSS needed.
1 2 3 4 5 6 7 8 9 10 11 12 13 14 15 16 17 18 19 20 21 22 23 24 25 26 27 28 29 30 31 32 <label for ="value1" > Low</label > <meter id="value1" min="0" max="100" low="30" high="75" optimum="80" value="25" ></meter > <label for ="value2" > Medium</label > <meter id="value2" min="0" max="100" low="30" high="75" optimum="80" value="50" ></meter > <label for ="value3" > High</label > <meter id="value3" min="0" max="100" low="30" high="75" optimum="80" value="80" ></meter >
1
2
3
4
5
6
7
8
9
10
11
12
13
body { padding : 40px 20px ; } label { display : block; margin-top : 15px ; } meter { width : 300px ; height : 20px ; }
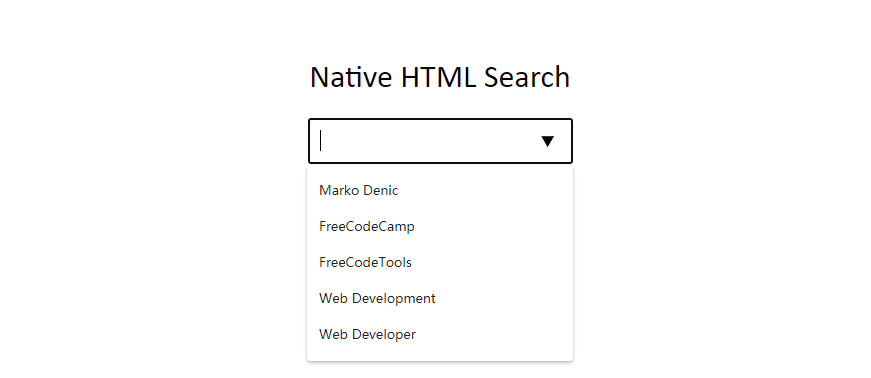
# HTML Native Search1 2 3 4 5 6 7 8 9 10 11 12 13 <div class ="wrapper" > <h1 > Native HTML Search</h1 > <input list ="items" /> <datalist id ="items" > <option value ="Marko Denic" > </option > <option value ="FreeCodeCamp" > </option > <option value ="FreeCodeTools" > </option > <option value ="Web Development" > </option > <option value ="Web Developer" > </option > </datalist > </div >
1 2 3 4 5 6 7 8 9 10 11 12 13 .wrapper { padding-top : 30px ; text-align : center; } .wrapper h1 { font-weight : normal; } .wrapper input { padding : 10px ; font-size : 1.2em ; }
# Fieldset ElementYou can use the <fieldset> element to group several controls as well as labels ( <label> ) within a web form.
1 2 3 4 5 6 7 8 9 10 11 12 13 14 <form > <fieldset > <legend > Choose your favorite language</legend > <input type ="radio" id ="javascript" name ="language" /> <label for ="javascript" > JavaScript</label > <br /> <input type ="radio" id ="python" name ="language" /> <label for ="python" > Python</label > <br /> <input type ="radio" id ="java" name ="language" /> <label for ="java" > Java</label > </fieldset > </form >
# Window.openerPages opened with target="_blank" allow the new page to access the original’s window.opener . This can have security and performance implications. Include rel="noopener" or rel="noreferrer" to prevent this.
1 2 3 <a href ="https://markodenic.com/" target ="_blank" rel ="noopener" > Marko's website </a >
# Base ElementIf you want to open all links in the document in a new tab, you can use <base> element:
1 2 3 4 5 6 7 8 9 10 11 12 13 14 15 16 <head > <base target ="_blank" /> </head > <div class ="wrapper" > This link will be opened in a new tab: <a href ="https://freecodetools.org/" > Free Code Tools </a > <p > Read more: <br /> <a href="https://developer.mozilla.org/en-US/docs/Web/HTML/Element/base" > MDN Documentation </a > </p > </div >
# Favicon cache bustingTo refresh your website’s favicon you can force browsers to download a new version by adding ?v=2 to the filename.
This is especially helpful in production to make sure the users get the new version.
1 <link rel ="icon" href ="/favicon.ico?v=2" />
# The spellcheck attributeUse the spellcheck attribute to define whether the element may be checked for spelling errors.
1 2 3 4 5 <label for ="input1" > spellcheck="true"</label > <input type ="text" id ="input1" spellcheck ="true" /> <label for ="input2" > spellcheck="false"</label > <input type ="text" id ="input2" spellcheck ="false" />
# Native HTML slidersYou can use <input type="range"> to create sliders.
1 2 3 4 5 <label for ="volume" > Volume: </label > <input type ="range" id ="volume" name ="volume" min ="0" max ="20" /> <label for ="result" > Your choice: </label > <input type ="number" id ="result" name ="result" />
1 2 3 4 5 6 7 const volume = document.getElementById('volume' );const result = document.getElementById('result' );result.value = volume.value; volume.addEventListener('change' , () => { result.value = volume.value; });
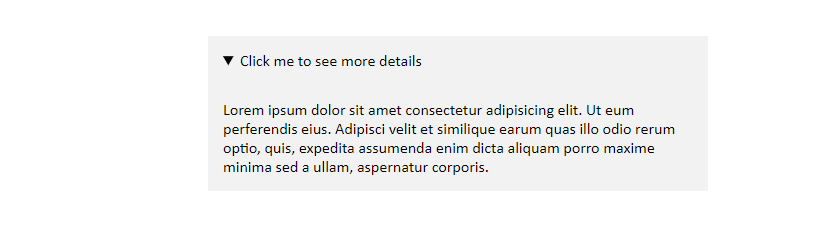
# HTML AccordionYou can use the details element to create a native HTML accordion.
1 2 3 4 5 6 7 8 9 10 11 12 <div class ="wrapper" > <details > <summary > Click me to see more details</summary > <p > Lorem ipsum dolor sit amet consectetur adipisicing elit. Ut eum perferendis eius. Adipisci velit et similique earum quas illo odio rerum optio, quis, expedita assumenda enim dicta aliquam porro maxime minima sed a ullam, aspernatur corporis. </p > </details > </div >
1 2 3 4 5 6 7 8 9 10 11 12 13 14 15 16 17 18 19 20 21 22 .wrapper { padding : 30px ; display : flex; justify-content : center; } details { width : 100% ; max-width : 500px ; } summary { background : #f2f2f2 ; cursor : pointer; padding : 15px ; } p { padding : 15px ; margin : 0 ; background : #f2f2f2 ; }
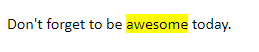
# mark tagYou can use the <mark> tag to highlight text.
1 <p > Don't forget to be <mark > awesome</mark > today.</p >
# download attributeYou can use the download attribute in your links to download the file instead of navigating to it.
1 <a href ="path/to/file" download > Download </a >
Use the .webp image format to make images smaller and boost the performance of your website.
1 2 3 4 5 6 7 8 9 10 <picture > <source srcset ="logo.webp" type ="image/webp" /> <img src ="logo.png" alt ="logo" /> </picture >
# Video thumbnailUse the poster attribute to specify an image to be shown while the video is downloading, or until the user hits the play button.
1 <video poster ="path/to/image" > </video >
Use the type="search" for your search inputs and you get the “clear” button for free.
1 2 3 4 <body > <label for ="search" > Input Type Search</label > <input type ="search" name ="search" id ="search" /> </body >
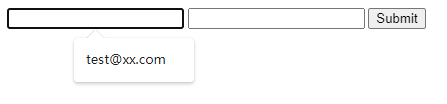
When submit form, the Browser will record the history of the input. The next time you focus on the same type of input will popup the history for autofill. If your website doesn’t want the Browser to do this, you can set autocomplete="off" .
1 2 3 4 5 <form > <input type ="email" name ="email" > <input type ="email" name ="email" autocomplete ="off" > <input type ="submit" value ="Submit" > </form >
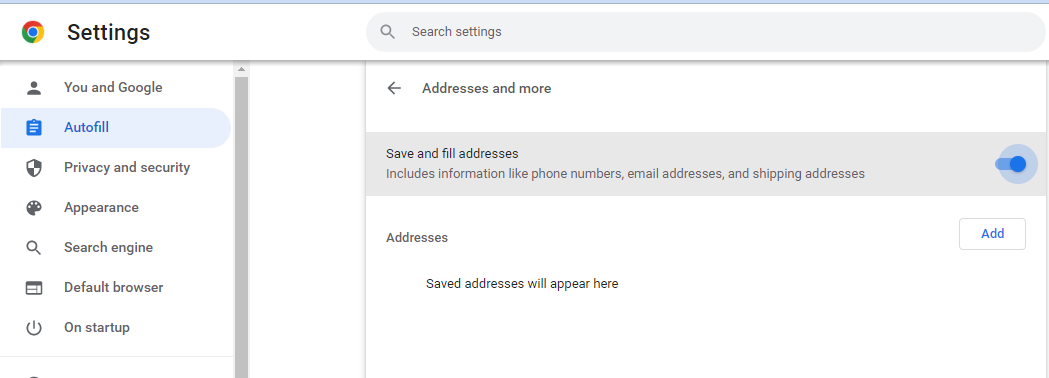
If you are a user, you can clean the history as below:
Deleting unwanted entries one at a time. Reference How to Delete Autocomplete History
Open Google Chrome.
Locate the field where the unwanted item is being autocompleted. This field can be any search box or the address bar .
Start typing the unwanted phrase or web address, or press the down arrow key until it is highlighted.
Press Delete . If the entry is not removed, press Shift+Delete.